Aquatic Spinal Injury Management
Spinal Injury Management in Water Environments
Part 2: Emergency Procedures
by Gerald M. Dworkin
Printed in July 1987 Parks & Recreation; Revised April 2014
 Spinal injuries in water can be greatly reduced if incidents are properly managed by those on scene. Personnel responsible for oversight of swimming pools and other aquatic recreational facilities must be trained on proper principles for safe behavior.
Spinal Immobilization Equipment and Training
All public and semi-public aquatic facilities should be equipped with appropriate spinal immobilization devices (SIDs), in addition to cervical collars, lateral stabilization items (i.e. blankets, towels, sand bags, and so forth), and appropriate immobilization material (i.e. straps and bandages).
Aquatic personnel should be well trained in using this equipment, as well as in appropriate response procedures should a spinal emergency occur. Backyard swimming pool owners should also know what to do to stabilize a victim with a suspected spinal injury until they can obtain emergency medical services personnel.
Handling Potential Spinal Injuries in Shallow Water
If you find the victim face down in the water, you must carefully rotate the victim to an upward facing ( supine) position.
Rotate to Supine Position
You must be careful to avoid any bending or twisting the victim’s neck and torso to avoid aggravating existing injuries.
Place one forearm along the length of the victim’s sternum with the hand of that arm supporting the bony structure of the victim’s lower jaw. Simultaneously place your other forearm along the length of the victim’s spine, supporting the victim’s head at the base of the skull with your hand. Then support the victim’s head and torso with your forearms and hands with an inward and upward pressure. As you do this, submerge, while maintaining this support position on the victim, and rotate the victim to a supine position.
Maintain Neck Alignment
Once the victim is facing upwards, you must then continue to support the victim from the side by placing one hand behind the neck and the other hand along the victim’s back. This technique will maintain proper spinal alignment of the victim and will keep him/her in a supine, upward facing, position. Additional rescuers should bring the necessary equipment (i.e. SID, straps, lateral head/neck restraint, and so forth) and position a cervical collar around the victim’s neck.
Spinal Immobilization
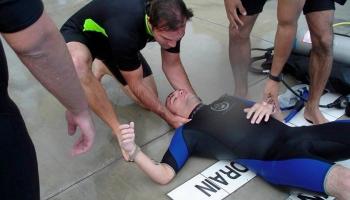
To place a spinal immobilization device under the victim, rescuers should position themselves at each end of the device, which is floated alongside the victim in the water. On command, the rescuers lower the SID beneath the victim and allow it to come up slowly until the victim is completely supported. Care must be taken during the ascent of the SID to properly align it with the victim. The first rescuer is responsible for maintaining the victim in alignment, in a supine position, until this is accomplished. Once the SID is in place and the victim is adequately resting on it, the first rescuer may then begin mobilizing the victim to the SID.
Head and Neck Immobilization
Place head and neck lateral immobilization restraints along both sides of the victim’s head in order to reduce the risk of any lateral movement.

Immobilization to the Spinal Immobilization Device (SID)
Once both the head and the neck are stabilized, begin spinal immobilization of the victim to the SID.
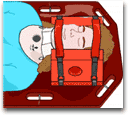
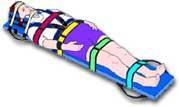
I recommend the following sequence for securing the victim to the SID using traditional straps and cravat bandages:
- Across the chest.
- Above the waist to include the arms at the sides.
- At the hips to include the hands at the sides.
- Above the knees.
- Below the knees.
- Across the forehead.
- Other – to include feet or other areas for additional support.
This technique of immobilization allows for the greatest mass of the body to be secured prior to securing the head. This procedure reduces the risk of aggravating cervical spinal injury should the body move because of wave action.

Spinal Injury Management in Deep Water
If you suspect a spinal injury in deep water, you should first turn the victim from a prone to a supine position. Then float the victim to shallow water, where you can then immobilize him/her onto an appropriate SID.
Facilities With A Uniform Deep Water Area
However, in aquatic facilities which have a uniform deep water area (i.e. diving wells) or those facilities where the deeper water is divided from the shallow water by a buoyed line, bulkhead, or other obstruction, you must bring the SID to the victim. First attach flotation collars or other suitable flotation devices to the SID. Place the flotation device/collar on the upper half of the SID only, to allow the rescuers to submerge the lower half under the victim.
Flotation Device-Collar Use
The flotation device-collar should be attached to the SID at all times, but still be easily removed while you immobilize the victim to the SID for transportation by ambulance to the medical facility.
Rotate From Prone To Supine Position
Rotate a victim in deep water from the prone to the supine upward facing position in the same way you would in shallow water. You can also use this same technique for a victim who is submerged and who may be lying on the bottom of the pool or open water facility. You must use extreme caution when recovering the victim in order to assure that the victim is maintained in alignment while being brought to the surface. To do this, support the victim as previously described and swim diagonally to the surface while rotating the victim to an upward facing position.
Moving Victim Onto SID
Placing the flotation SID under a victim in deep water requires two to three rescuers. It is preferable that rescuers wear some type of personal flotation device (PFD) during the rescue to lessen their fatigue.
Rescuer #1 rotates the victim to, or maintains the victim in, an upward facing position.
Rescuer #2 places a cervical collar around the victim’s neck.
Rescuer #3 positions the flotation SID in preparation for placement under the victim.
One rescuer places the foot end of the SID at the victim’s head.
Rescuer #1 supports the victim’s head and neck with one hand and guides the flotation SID with the other hand in order to prevent the SID from hitting or making contact with the victim.
Rescuers #2 and #3 grab the victim’s upper arm near the armpit, and slide the victim onto the flotation SID. Because the lower half of the SID has no flotation attached, it is easily submerged for this purpose. The support provided by the water and the flotation SID provides sufficient support for the entire body.
Immobilize The Head, Torso and Extremities
Once the rescuers have placed the victim appropriately on the flotation SID, they temporarily immobilize the head with a lateral restraint device (i.e. rolled blanket or sandbags) and secure the torso and extremities. Cravat bandages are then used to immobilize the head.

Remove Victim From Water
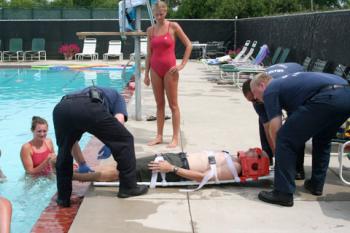
After the rescuers immobilize the victim onto the flotation SID, they should float the victim along the long axis of the body to the platform or deck for removal from the water. Then pull the head of the SID onto the platform while allowing the foot of the device to drop deeper into the water.
Flotation Basket Stretcher Use
To expedite the handling of suspected spinal injuries in open water areas where additional protection of the victim may be required, you can use a flotation basket stretcher. This device consists of a standard basket stretcher with a suitable SID secured within it, and a flotation collar attached around the upper half of the stretcher. The SID should be secured to the stretcher at the head and foot so that you can easily remove it from the basket stretcher once the victim is placed on shore. The victim immobilization straps are attached to the SID and not to the basket stretcher.
The flotation basket stretcher is especially beneficial in white water rescue operations and when the victim is being handled in surf, moving water, or cases when the victim will be transferred from the water to a boat or helicopter.
Placing the flotation basket stretcher under the victim and immobilizing the him/her into the device are very similar to the techniques used to immobilize the victim on the flotation spinal immobilization device. However, after removing the stretcher from the water, you also remove the two straps securing the head and foot of the SID to the basket stretcher. This allows you to remove the SID, with the victim attached to it, from the basket stretcher for emergency transport to the medical facility.
Handling Victims in Backyard Swimming Pools
Once you have turned the victim from a prone to supine in the water, you should maintain the victim in a horizontal position until emergency medical personnel arrive. If a rigid support is available, such as an ironing board or picnic bench, place it under the victim and then raise it until the victim is resting adequately on the support. This will help immobilize the victim’s spine until the EMS personnel arrive. If a rigid support is not available, you should support the victim on the surface of the water until additional medical help arrives.
Rescue Breathing and CPR
In all cases, once you have turned the victim from a prone to a supine position in the water, you should determine whether or not the victim is breathing. To do this, keep the head and the neck in a neutral position, place your cheek directly above the victim’s mouth and nose and look at the chest.
If The Victim Is Breathing
If the victim is breathing, you should be able to observe chest movement and hear and feel the victim’s breath against your cheek.
If The Victim Is NOT Breathing
If the victim is not breathing, you should provide two slow, full breaths to the victim and then check the victim’s pulse.
If the victim is not breathing, but has a pulse, then perform rescue breathing with the victim maintained in the water until he/she can be immobilized onto an SID and removed from the water.
If the victim is not breathing and does not have a pulse, you must immediately remove the victim from the water to a firm flat surface and administer CPR. When removing the victim, attempt to keep the victim from twisting or bending.
Summary
To reduce or eliminate spinal injuries in the aquatics environment, general principles for safe behavior must be practiced by the public, and must be enforced by the facility management. Recreation personnel responsible for providing aquatic recreational opportunities must implement and enforce every safeguard possible to eliminate or minimize the risk of injury which may lead to spinal injury.
Families with backyard swimming pools should know proper first aid, CPR, and basic water rescue skills. This training is offered by such organizations as the American Red Cross, YMCA, American Heart Association, as well as many others. First aid kits should be available with sufficient dressings and bandages to stop bleeding and prevent infection from cuts, scrapes, and so forth. A telephone should be available with the local emergency medical services (EMS) telephone number posted nearby so these services can be contacted if needed.
The same principles apply to recreation personnel. Lifeguards need to know first aid, CPR, and lifesaving techniques. Spinal immobilization, first aid, and water rescue equipment must be readily available for use during an emergency. And, the lifeguard personnel must be proficient in its use and in spinal injury management.
Recreation agencies and personnel can play a crucial role in educating the public in preventing spinal injuries. Whenever possible, spinal injury prevention programs, such as the Feet First, First Time program and the Learning How to Dive program (mentioned in Part I of this article July, 1987, PARKS & RECREATION) should be implemented and integrated into school and community settings in order to educate the public, especially pre-teenagers, about the dangers of diving into unknown bodies of water or shallow water. These educational programs should also include basic principles of how to dive properly.


